Add High Impact to Your Photographs Using Simple Effects
by Gordon Kamitomo
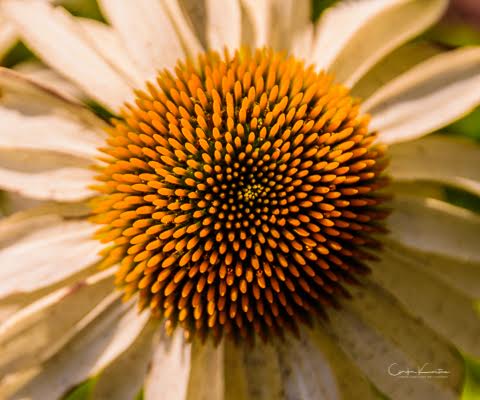
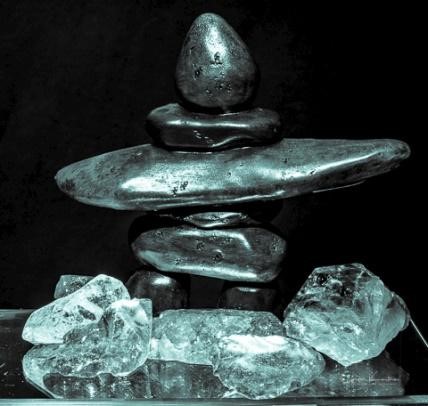
Image: Gordon Kamitomo Photography
In my last blog, I wrote about how to create beautiful black and white photographs. Today, we’re going to kick it up a notch and delve into how to create effects that add even more impact to your photos using Adobe CC LightRoom software. LightRoom has a huge learning curve, but well worth it once you get the hang of it.
The Base Image and Basics
Effects goes beyond the base photography image, so that you can produce work that’s both high quality and unique. It’s how you brand your photography, like I do with my flowers. In today’s market, it’s imperative to be able to produce photographs that are both high quality and unique. Depending on what genre, there is a difference between shooting in RAW format as opposed to JPEG, such as when lighting isn’t ideal, Mother Nature doesn’t co-operate, flash mis-fires or when you lose the shot. If you shoot in RAW, the image might not be what you want, but with JPEG, it just might be right. If you are working in RAW, the format is all the data that your camera sensor captures. A JPEG simply cuts off dark and light at a certain point.
Creative Direction and Photography Software Applications
There are a few of things around creative direction. When I shoot, I use software to adjust exposure/contrast, cropping if needed, perhaps some color balancing, but there are times when you see someone else’s photographs and think, “How did they do that?” Between photography research and commercial advertising meetings I attend, there are some very distinct trends cropping up in photography for 2018. These include HDR, retro, pastels and black and white. These special effects and settings can be created using software like Adobe PhotoShop or LightRoom. Some simple software editors can create similar effects, but may not necessarily allow for the flexibility that more advanced applications do.
There are other photography effects software that can work as efficiently as Adobe. I consider myself an ‘intermediate’ user of LightRoom, but when I started doing more portraiture work the dilemma came up about re-touching. LightRoom has very limited capability compared to PhotoShop for retouches in portraiture photography. I have PhotoShop, but am not at an advanced level to use it, so I looked for an alternative. A pro photographer and I were doing a joint Linkedin headshot photo shoot and he introduced me to the software, Portrait Pro Studio which can use RAWs. It would have taken approximately 20-40 hours to become marginally proficient in PhotoShop. With PortraitPro Studio, I produced high quality photographs within 2 hours of learning the software, greatly reducing my retouching time down to minutes instead of hours. The cost of the software vs increased efficiency in my workflow was worth it. When software doesn’t have the effect I visualize, I’ll move the image from LightRoom to another application.
The below shot is an example of special effects created in the software program, Smart Photo Editor. The original photograph was somewhat blah with no punch or impact. It also didn’t lend itself to anything I liked inside the LightRoom presets. Instead, I used Anthropics Smart Photo Editor:

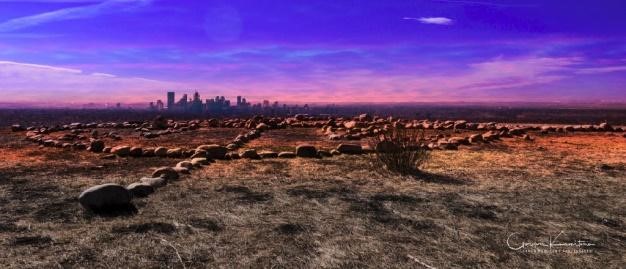
Image: Gordon Kamitomo Photography
HDR (High Dynamic Range) Photographs
As this name implies, HDR extends the range between light and dark. There are times when HDR can level out a high contrasts to add more depth and detail to a photograph. Architecture and landscape shots typically lend themselves very well to this. It can also be used for subtly to the point where it’s undetectable. When HDR is used correctly, it adds a lot of impact and dynamics to a photo.
Before using HDR effects:
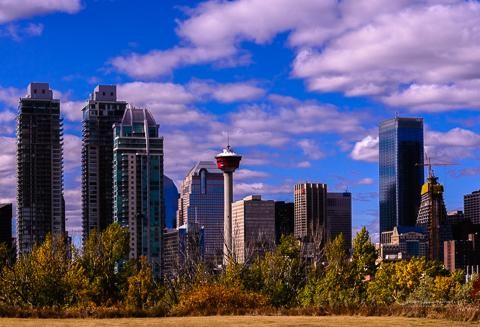
Image: Gordon Kamitomo Photography
After using HDR effects:
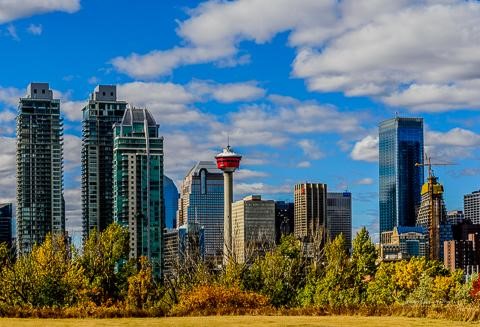
Image: Gordon Kamitomo Photography
The cityscape leveraged HDR to a huge advantage here as it fits well for an architectural type print.
Retro Photographs
Retro covers off everything from the antique effect, to that old film cinematic effect and other past eras. Choosing the correct effect for retro photography can create a totally different look to the same photo which lends to a more subdued effect. Many times, these special effects are used to create a specific mood or look from the retro years. Faded, light leaks, and sepia tones are common effects used. This is where fitting the subject to the theme can add a lot of dimension to a photo.
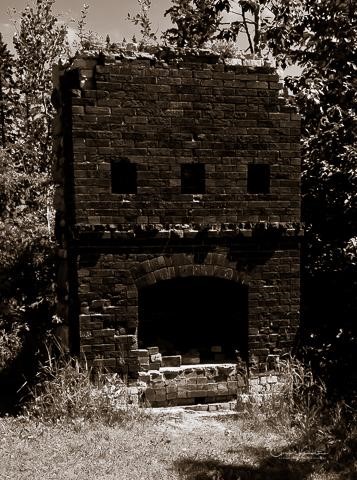
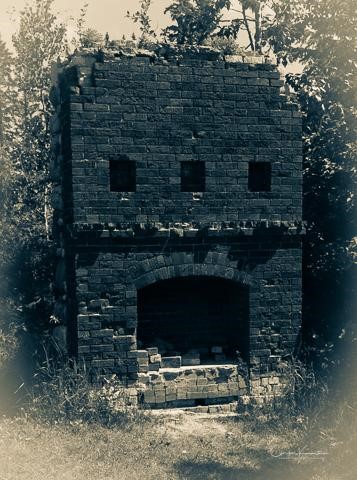
Here’s an example of how to incorporate the retro look into your photos. This photo of an outdoor brick oven taken near Cochrane, Alberta:

Image: Gordon Kamitomo Photography
This photo now looks very different with a variety of retro/antique effects added. There are several ways of achieving this in LightRoom:
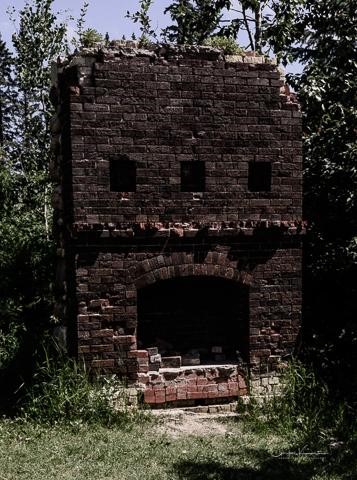

Images: Gordon Kamitomo Photography
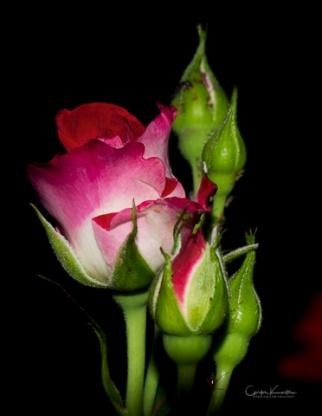
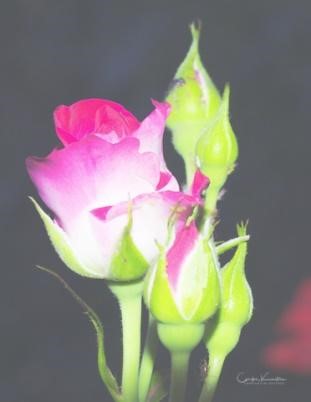
Pastel Photographs
Adding pastel effects is the opposite of bold and dynamic with their softer, more neutral level colors. It’s a bit of a spin-off from the retro look as well, as pastels tend to be associated with that retro look. Pastels can also impart a very moody type look to literally any photo.
Before pastel effects:

Images: Gordon Kamitomo Photography
After with pastel effects:

Images: Gordon Kamitomo Photography
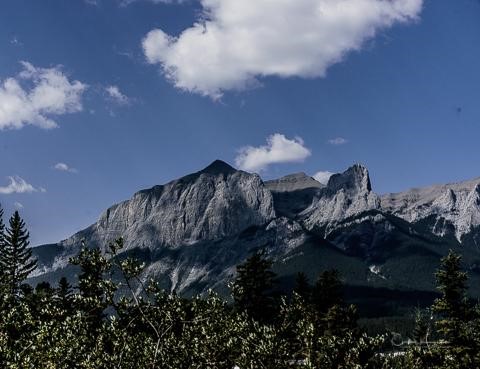
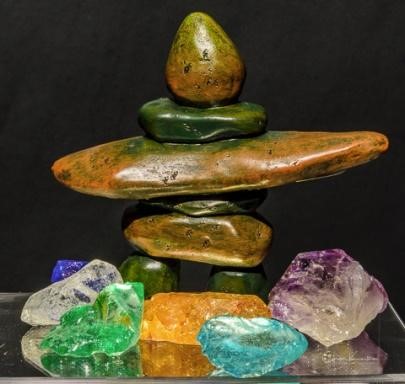
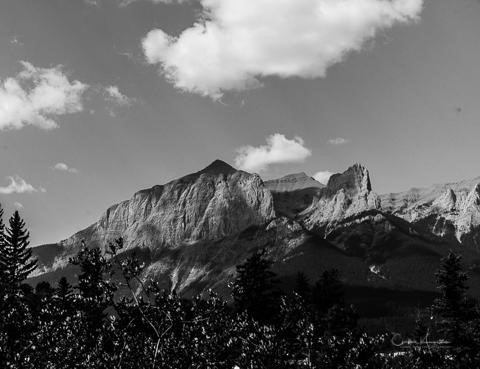
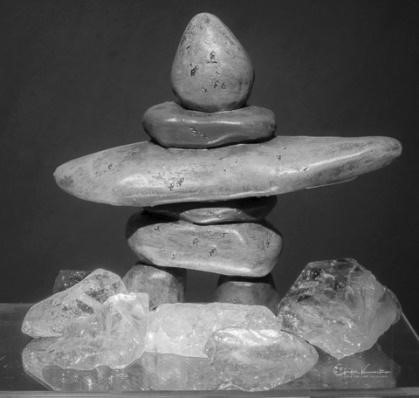
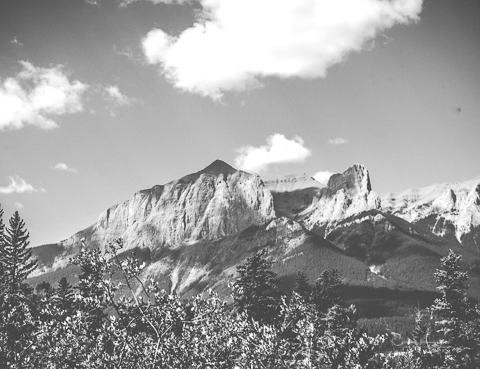
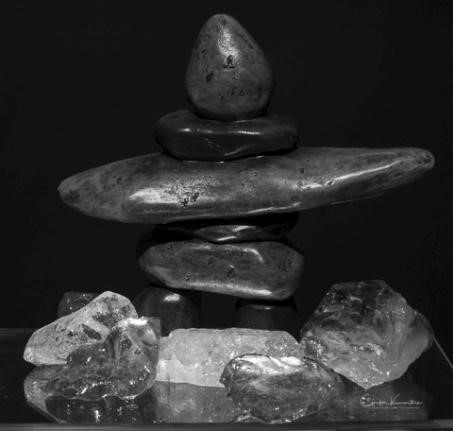
Black & White Photographs
When you decide on an image for black and white photography, it’s important to remember that black and white can also be done in camera, so you may not always need software. Having said that, software improves the contrast and tonal range to create a more dynamic and impactful image. Street photography in the early morning or at night lends itself very well to monochrome due to the differences in contrast. Certain portraits, landscapes and nature have high contrast lighting in particular with a lot a tones and gradation.
The original photos:
Images: Gordon Kamitomo Photography
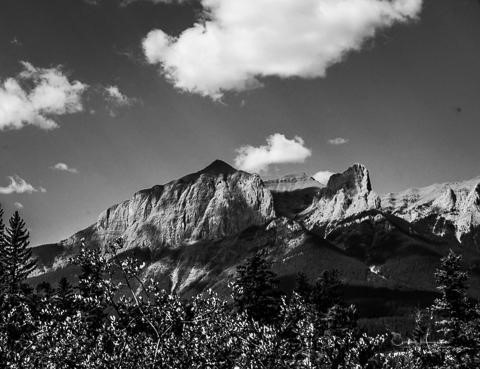
These photos lend themselves very well to a black and white conversion. A simple click for a high contrast preset and we get this effect:
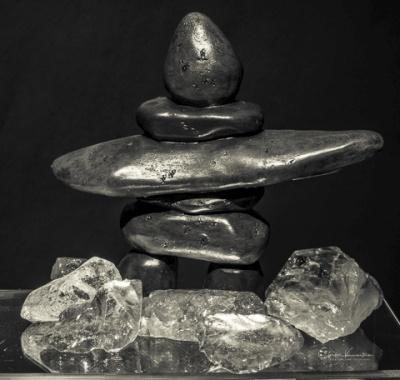
Images: Gordon Kamitomo Photography
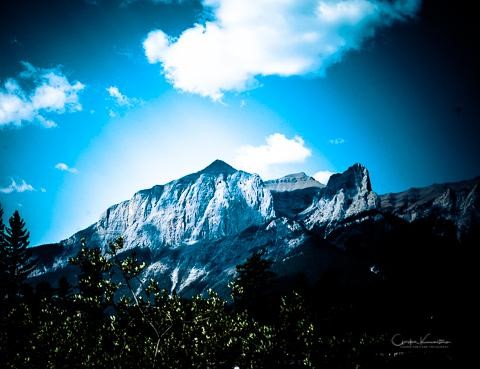
To allow for a more moody effect:
Images: Gordon Kamitomo Photography
To allow for a softened effect:
Images: Gordon Kamitomo Photography
To allow for a tinted, more cold effect:
Images: Gordon Kamitomo Photography
These examples are just just the tip of the iceberg. Other applications like Adobe PhotoShop or Smart Photo Editor have the ability to add even more effects.
Happy Shooting!